
A Next.js app inbox notification center serves as a centralized hub where users can view all their notifications at any time, improving user engagement and ensuring no crucial update goes unnoticed. In this tutorial, we will walk you through the process of implementing a robust notification center in a Next.js application, covering everything from setting up the backend to creating a user-friendly notification feed on the frontend.
By the end of this guide, you will have a fully functional notification system in your Next.js app, complete with real-time updates. This implementation will not only enhance your app's user experience but also provide a scalable solution for managing notifications.
Key topics covered in this article include:
- Setting up a new Next.js project for your notification center.
- Building the backend with Node.js and Express to handle notifications.
- Creating the frontend notification widget and integrating it with the backend.
- Implementing real-time updates to keep your notification feed current.
- Styling the notification UI to ensure it is responsive and user-friendly.
Whether you're referring to it as an in-app inbox, notification widget, or alert center, the concepts and steps remain consistent. Let's dive in and start building your Next.js notification center!
Prerequisite
- Working knowledge in Next.js
- Account on SuprSend along with the secret key and token
- Next.js application
Where will we build our app inbox in Next.js?
For this tutorial, we have created a demo Next.js project, called as b2b2c-freight_company which is available on Github. We have also deployed the application on Vercel, so you can access the notification feed in Next.js in real time here Freight B2B2C App (b2b2c-freight-company.vercel.app)
Building a real-time notification center in Next.js
Let’s get started!
Step 1: Creating account on SuprSend
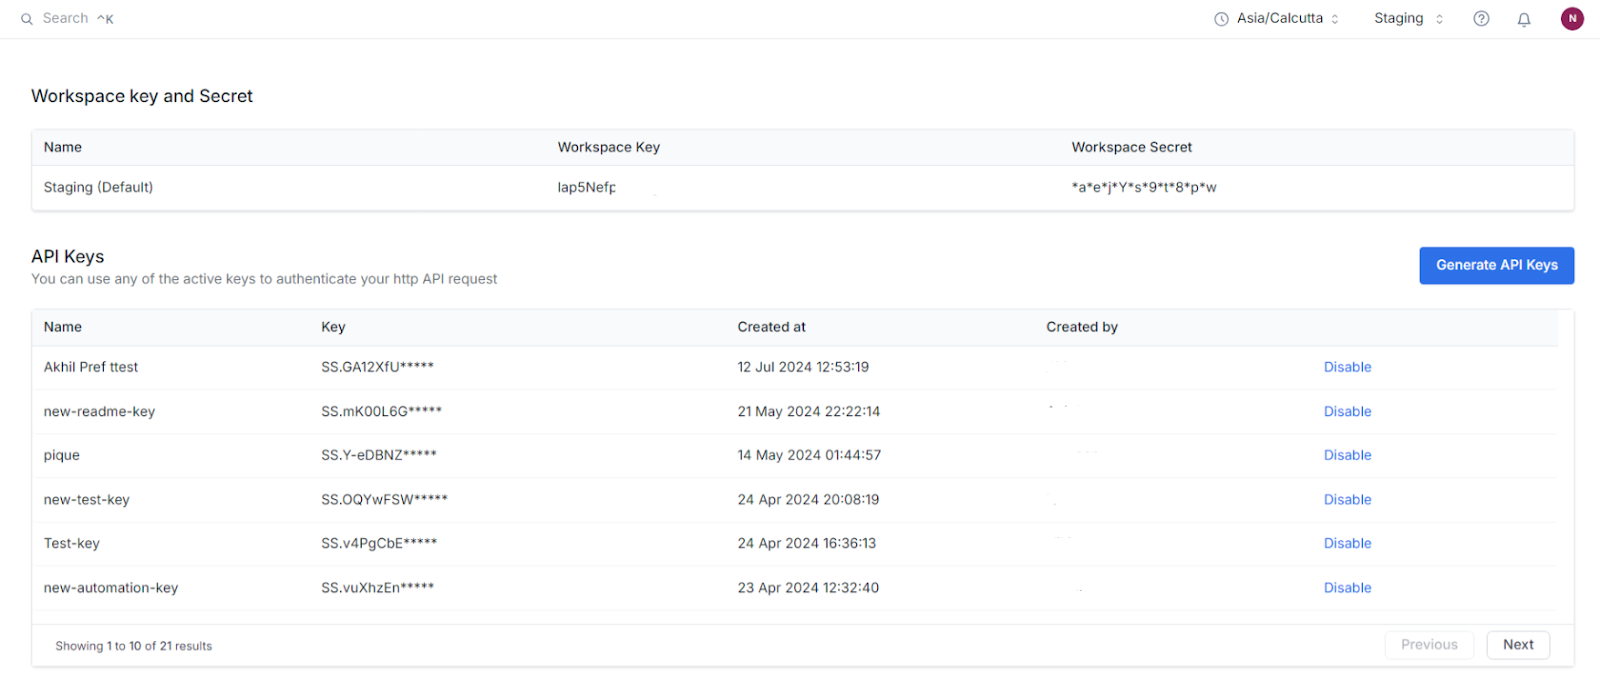
Start by creating a new account on SuprSend. Once you pass the onboarding process, you can find head to Developers → API Keys in the sidepanel. You will find your Workspace Key and Workspace Secret here.
Step 2: Finding the right place for app inbox in your application
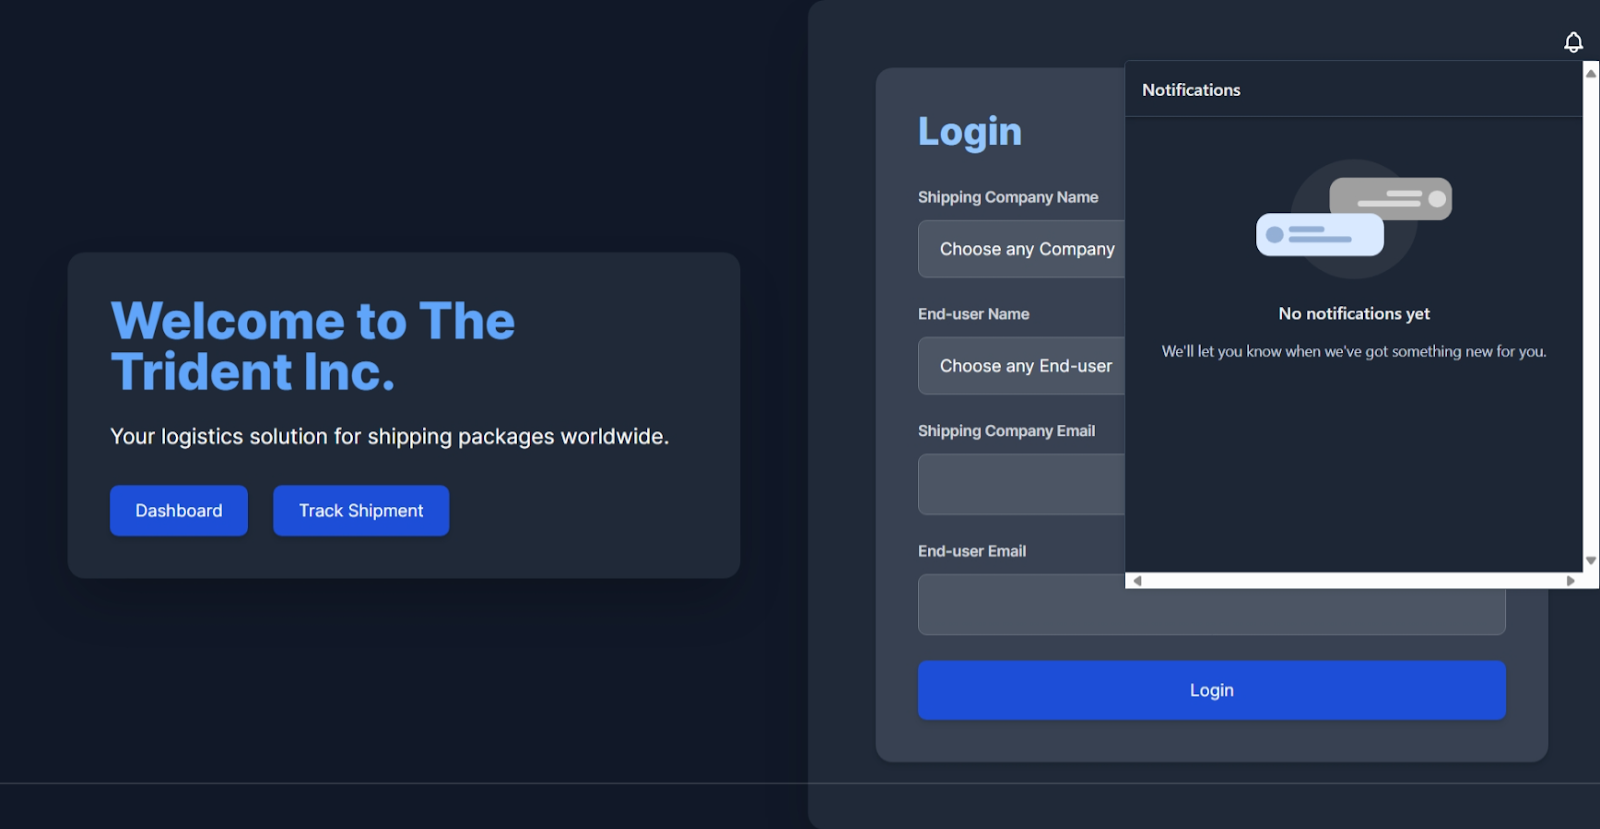
Usually the app inbox is situated on the header along with other menu options. However in some cases, businesses can also give it as an option in side panel for a full-page notification center, similar to LinkedIn.
In our case, we will be implementing the notification center in our navigation header. You can find the relevant code here b2b2c-freight_company/src/app/page.tsx at master
Step 3: Installation and Integration of SuprSendInbox in Next.js
1. Install the SuprSend App Inbox Package
First, you need to install the SuprSend app inbox package. Open your terminal and run the following command:
2. Import Necessary Packages
Next, import the necessary CSS for toast notifications in your code where you want to showcase the app inbox component:
3. Disable Server-Side Rendering for SuprSend
To optimize the initial loading and ensure the SuprSend inbox functions correctly (as it needs access to browser-specific APIs), you should disable server-side rendering (SSR) for the SuprSend component. Use the following code:
This code snippet uses next/dynamic to dynamically import the SuprSendInbox component. The { ssr: false } option ensures that the component is only rendered on the client side, which is crucial because SuprSend relies on browser-specific APIs that are not available during server-side rendering.
4. Place the SuprSendInbox Component
Once the SuprSendInbox component is imported, you can place it within your navigation bar or any other desired location. You also need to define the workspace keys. Here's how you can add it to a fixed position at the top right of your page:
In this example, the SuprSendInbox component is placed inside a div with className="fixed top-0 right-0 m-4 z-50", which ensures it stays fixed at the top right corner of the page.
5. Styling the App Inbox Component
If you are using Tailwind CSS, you can easily style the app inbox component. To integrate the inbox seamlessly into your navigation panel, place the component directly inside the navigation <div> class. Here’s an example showing how to integrate and customize the component:
The SuprSend app inbox provides various customization options through props:
- workspaceKey: The key associated with your SuprSend workspace.
- subscriberId: The identifier for the subscriber.
- distinctId: A unique identifier for distinct user tracking.
- themeType: The theme of the inbox, e.g., "dark" or "light". In this application we will use dark theme to match our application theme.
By adjusting these props, you can tailor the appearance and behavior of the app inbox component to fit your application’s design and functionality requirements. Additionally, you can modify the styling using Tailwind CSS classes to ensure consistency with your overall UI.
SuprSend provides a lot of customisations in terms of design inherently. You can access everything by just passing a prop to the app inbox component. All details are in this documentation page Customize Inbox (suprsend.com)
Step 4: Setting env variables
Environment Variables: Ensure you have the environment variables set in your .env file:
- Error Handling: Implement error handling for the fetch request in the handleSubmit function to provide feedback to the user if the login fails.
- Component State Management: Manage the state using React's useState hook to handle form inputs and potential error messages.
- Responsive Design: Use Tailwind CSS to ensure the component is responsive and adjusts to different screen sizes.
Step 5: Setting the triggers for notifications
By now, your app inbox is all set and visible. Now you need to configure triggers for sending notifications. It should be passed as an event to SuprSend. You can use any backend SDK to trigger events to app inbox.
Let’s use Node SDK in this application. You can send and trigger events by following this documentation Send and Track Events (suprsend.com)
We will cover the trigger part in our next guide.
Key Points
- Make sure server-side rendering is disabled, as the app inbox works only on the client-side.
- To generate the subscriber key, you need to do the HMAC authentication from any of our backend SDKs.
Integrating an app inbox notification center into your Next.js application significantly enhances user engagement and ensures that important messages are never missed. By following the steps outlined in this guide, you can effectively implement the SuprSend app inbox, leveraging its dynamic import and client-side rendering capabilities to optimize performance and functionality.
This approach not only streamlines the notification process but also offers extensive customization options to fit seamlessly within your existing design. With these tools, your application will provide a more interactive and satisfying user experience, keeping your users informed and engaged at all times. Now, you can focus on building more features, knowing that your notification system is robust and efficient. Happy coding!


